


Quite often we have seen (and done it ourselves) people end up picking up the wrong set of bushings for the diff on this car.
The unfortunate reality is that most websites will list the wrong bushing for the hanger bar, call for an RS bushings, or plain just don't even have the right part for this application.
As usual much thanks to Aaron as he went through the process of getting the right parts, and knowing how to install them - I just spectated, got correct part numbers, and wrote it down.
If you want some hints on how to remove your rear differential read this article: CN9A Evo IV GSR rear differential removal (with AYC) (it's a very similar, even easier, process on cars with the RS diff).
There are a few things we must get cleared up here: we did this, more than once, we measured, tested and applied (with that said, still do this at your own risk and get the parts that you believe to be correct for your vehicle):
1. On the Evo IV the GSR and RS replacement bushings are THE SAME; meaning there is no RS bushing for the Evo IV. Don't be fooled if you have the rear LSD RS diff on your vehicle.
2. The GSR and RS support members (so your hanger bar and mustache bar) are different shapes to accommodate the differentials, but mounting points and (again) the bushings are the same.
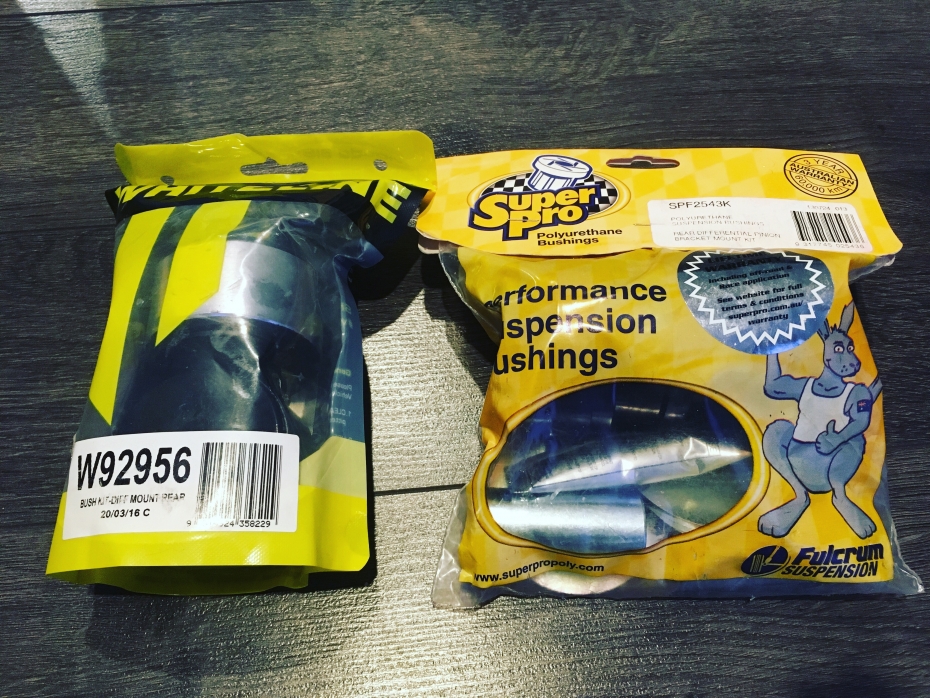
3. WHITELINE at this moment does not appear to have the correct bushing for the hanger bar for this vehicle, but SuperPro does (expect they may give you two options, one of the options is wrong).
4. The part numbers you are looking for are: WHITELINE W92956 for the mustache bar, and SuperPro SPF2543K for the hanger.

5. Lets look at the diagram below that will point out what people refer to as the mustache bar (I still get confused myself sometimes) and what the hanger bar is I'm referring to, and also what these parts are referred to in the Work Shop Manual.

Point 1: The subframe, referred to as the "rear crossmember and differential carrier".
Point 2: The so called mustache bar, referred to as the "differential support arm" (you may also see it simply called the support bar - but so is the following one... not very descriptive)
Point 3: The hanger bar, referred to as the "differential support member" (also sometimes called the support bar; go figure...)
From now on (and as previously) I will refer to the components as subframe, mustache bar, and hanger bar for convenience.
Do this at your own risk, know your skill level. You can do this outside of our recommendations, however we don't endorse hammers and ice picks (jokes aside, you may want to consider doing this properly).
We have an article on removing old bushings on the Front Lower Arm which has some detail on how the get the bushings out, you might want to give that a read as well, you can skip to the "Replacing the caster bushing:".
Here is the link to the article: CN9A Evo IV Front lower arm removal (and caster bushing replacement)
Things you will want to have (and if not, maybe take it to a shop to have it done properly):
1. A press, we used a 20ton press.
2. A vice.
3. A metal cutting tool of your choice (something you can fit into the inner diameter of the metal casing on the OE bushings
4. A sharp knife (such as a utility knife)
5. Strong flat screw driver
6. Hammer
7. Sand paper 150 grit (or coarser)
8. A die grinder with a metal smoothing attachment
9. An extra set of hands.
Step 1
Remove old bushings.
This is where a vice comes in handy; grip the bars in a vice to help you cut the bushings out.

First you will cut out the rubber portions of the inside of the bushings. Use your utility knife (or a similar cutting tool) and cut the rubber around the bushing until you can take the inner sleeve out.

Next with your metal cutting tool cut the sleeve of the bushing to be able to start bending it towards the inside. This will allow you to release the pressure and essentially hammer the sleeve out.
Don't cut too deep, you don't want to damage the surrounding metal.
Use a flat screwdriver to bend the sleeve, do that until you can hammer the sleeve out.
This process is pretty much the same on both the mustache bar and the hanger bar.

Step 2
Prepare surfaces for bushing installation.
On both bars (hanger and mustache) use sand paper to smooth out any anomalies on the inside where the bushings came out (or where the new ones will go in).
Make it as smooth as possible, this will help you with correct installation of the new bushings.
On the mustache bar clean up the bevel, with the die grinder, on the side you will be pressing the bushing in. This should allow for easier and straight installation of the new bushing.


Step 3
Install new bushings.
The hanger bar bushings (if you go the ones we recommend) are easier to install. They are two piece and all you need to do is put them into the bar; here pay attention to the top and bottom parts as they have different thickness of the outer sleeve (they will be marked with "top" and "bottom", but basically the thicker one is the top).

You don't need to, but certainly can, use some grease (which should come in the package), to lubricate the surface you will be inserting the bushings into.
Now you definitely want to grease the inner selves before you push them into the bushing. When pushing the inner sleeve you may need to lightly tap it with a hammer to get it all in.
The mustache bar bushings are the tougher ones. Utilize the extra set of hands here.

Use the 20ton press to push these bushings in. You'll likely need someone to hold the mustache bar in place while you use the press.
Take your time and ensure the bushing is going in straight. You want the bushing pressed in all the way so that it's as even as you can get it on both sides of the bar (i.e. no large gaps, or metal sleeve sticking out) - otherwise it will be nearly impossible to install onto the subframe.
That's all folks!
When installing these components on the vehicle we recommend using the provided grease to lubricate any "rubber" to metal contact (especially when installing the mustache bar onto the subframe - this makes it a lot easier).

This way you'll prevent some squeaking and help your new bushings live a happier smoother life (as opposed to grinding them against bare metal when you're driving the car).
|
|
|
||||||||||||||||


|
|
 |
 |